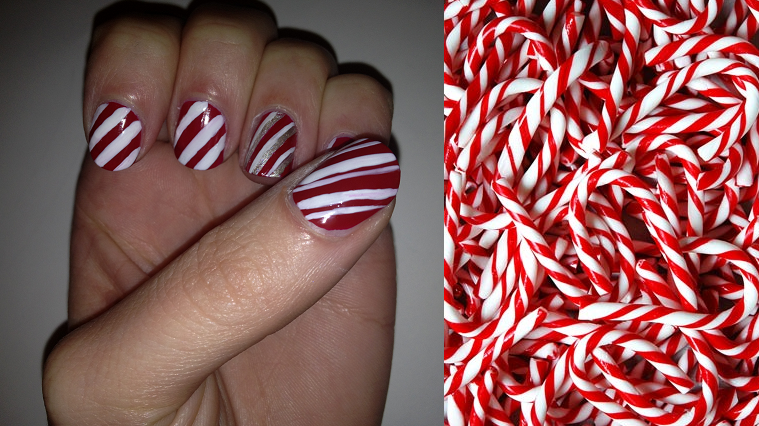
Christmas is coming and with Christmas comes joy and happy manicures! Be honest, even though it’s only the start of December; you can already hear the jingle bells ringing. You should totally treat yourself with yummy candy cane nails!
You’ll need:
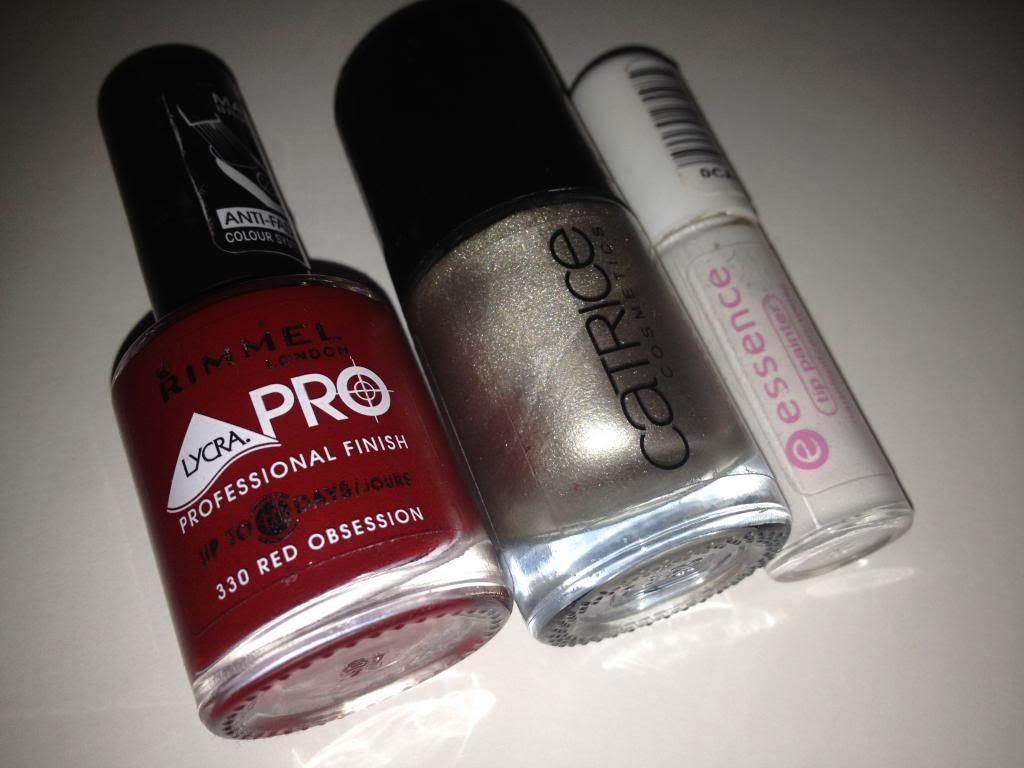
- White nail polish (Essence Tip Painter)
- Red nail polish (Rimmel Lycra Pro - 330 Red Obsession)
- Silver nail polish (Catrice - 300 Be My Millionaire)
- Top coat
- Striper brush (Essence Tip Painter)
1. Apply a coat of red nail polish. Let it dry well. If necessary, apply another coat and let this dry well too.
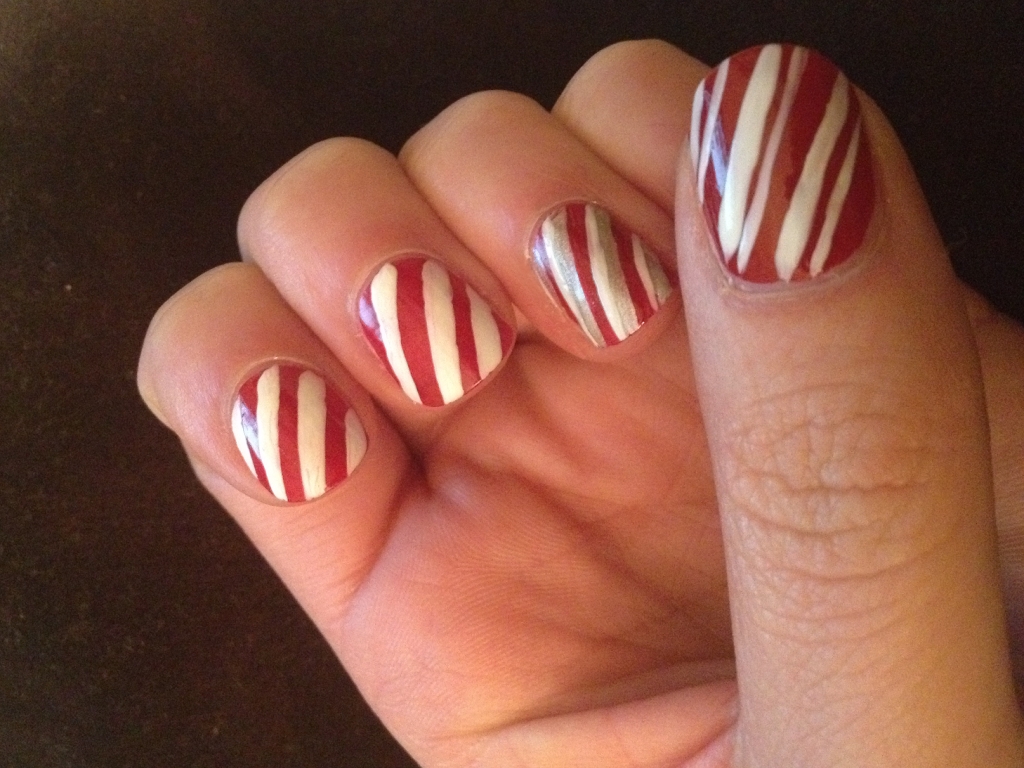
2. Paint white, diagonal stripes on top of the red. Use a nail polish with a striper brush. This makes it easy to draw the stripes! Make sure the red nail polish has dried well, or your white stripes will turn into pink stripes!
Some nail polishes are sold with a striper brush, instead of a normal brush, but you can also buy an individual striper brush. They’re not that expensive and really useful with nail art!
If you want the stripes to be perfect, you can use tape. But it’s okay if they're not perfect! To keep it fun, skip the thumb and the ring finger.
3. Usually a mani has one accent nail, but today we’re doing two! Start with the thumb: paint a normal diagonal strip and right next to it a thin one. On my nails I have three (thin and thick) stripes.
4. Then it’s time for your ring finger. With a striper brush (you can use the one you used before if you clean it with nail polish remover) you draw diagonal stripes with a silver nail polish. Just as thick as the stripes you drew on the other nails.
5. With the striper brush draw a thin white line on one side of the silver line on your ring finger. You’ll get this funny, almost 3D effect! Seal your pretty mani with a top coat and you’re done! To make it more Christmas-y, you can apply a top coat with fine glitters.
Tip: if you made a booboo, clean your striper brush, dip it in the red nail polish and go over the mistake you made. Andddd, it’s gone!
Photo without flash
This mani took me about 15 minutes. That includes letting the nail polish dry, so it's not that long.
Jingle all the way! Hope you liked the tutorial!
Jingle all the way! Hope you liked the tutorial!
Will you be doing this yummy mani?


I love this. Super cute and fun for Christmas. I have short nails, but this looks pretty simple and so I am hoping it will still work. :)
ReplyDeleteGlad you like it! It also works on short nails, I promise! X
DeleteI love it, u make it soo easy to everyone to have cute Christmas nails, I love the colors too xx
ReplyDeleteGlad you like it! Pretty (and yummy) nails don't have to be hard to make. That's why I created the tutorial, to show how easy it actually is! :) X
DeleteWow this looks great but I'm terrible at nail art haha but I'm going to give this a go :)
ReplyDeleteDon't worry! I'm not a big star in nail art either, and look! It still turned out well! It's very easy, really :) X
DeleteVery cute! :) xx
ReplyDeletehttp://hellotashaa.blogspot.co.uk/
Looks too adorable!
ReplyDeleteLove Nyt,
from
BIG hair LOUD mouth
So cute! I love how you varied the stripes on the thumb and the accent nail. I'm not sure if I'm coordinated enough to do the stripes without getting polish everywhere, but I would love to try it sometime!
ReplyDeletexx Ellie
www.ellalogy.com
Thank you, Ellie! With a stripe brush it's actually really easy! And you can always use tape :) X
DeleteOh you make it seem so easy! Love how festive it looks! Great job girl :)
ReplyDeleteThank you!! Really glad you liked it! Xxx
DeleteHet ziet er geweldig uit! Ga het binnenkort ook uitproberen!
ReplyDelete-True
Stuur me een foto als je het hebt uitgeprobeerd! Ben benieuwd hoe het eruit ziet :) Thank youu! X
DeleteDat ziet er echt geweldig uit! Ga 't zeker nog voor kerst uitproberen :-)
ReplyDeletexoxo The Daily Fashion Drug
Dank je wel! Ik hoop dat het mooi gelukt is! X
DeleteI love it! Its so cute and simple :D really like that you added an accent nail :)
ReplyDeletehareem x
Really glad you liked it!! I thought I'd spice it up a little with the accent nails! :) X
DeleteLOVE this Sal, it is sooo prettty!!!!!! And they look indeed yummie ;)
ReplyDeleteWhat do you think of my latest nailpost? http://limesandsmiles.blogspot.nl/2012/12/sephora-essie-and-opi-haul.html
Thank you!! Glad you liked it, Ina! I'm going to take a look right away! You got me curious :-) X
DeleteVery cute,a fun and easy mani,Love it:)
ReplyDeleteSo cute ^^
ReplyDeleteThat looks so pretty! I'll definitely try it out myself ;-). I found your blog through blog hop, and I'm following now. I'd love for you to check out my blog. x
ReplyDeleteRaves 'nd Ramblings
Thank you! I'd love to see the result :)
DeleteThank you so much for following! Of course I'll check out your blog! X
I love how these turned out :)
ReplyDeleteNice nails! Nice blog you have!
ReplyDeleteThank you and thank you!! X
DeleteVery cute! I did something similar but vertical striping for when the AFL final was on for the sydney swans :) May I ask where you got your striper from? x
ReplyDeleteThank you! Oh, that must've looked great as well! Mine is from Essence. It's a nail polish with a different brush: a striper brush. It's meant for french manicure, but I love to use it for nail art! X
DeleteOooh I love it, they look absolutely adorable! <3
ReplyDeletehttp://www.youremyfavouriteflavour.blogspot.co.uk/
Thank you so much for your comment! X
DeleteLadies, thank you so much for your comments! As usual I really enjoyed reading them! Xxxxxx
ReplyDelete