Perfect and neat brows: sometimes it seems like mission impossible! With a few tricks under her sleeve, a woman can achieve more than she knows. Here are 10 steps to get to those perfect brows!
I get a lot of compliments and questions about my eyebrows, so I decided to do (another) tutorial. A while ago I already did an eyebrow tutorial, but this tutorial has more steps and makes it more clear how I do my eyebrows. I have to say by forehand: I have extremely thick eyebrows. Before this tutorial I let them grow out for 1,5 month, but only the upper side, so they still look kind of neat. Also, they're not similar. One eyebrow is round, while the other is more square. It's important to set for yourself what kind of shape you want. Anyway, these basic steps will work on everyone!
You’ll need:
- Good tweezers
- A pencil or brush to use as a tool to create guidelines
- A pass, like a credit card (don't worry, it's not going to cost you anything!)
- An eyebrow brush
- White pencil eyeliner
- Makeup removing cleansing wipes
A big tip before we actually start: when you’re doing your eyebrows, do them both at the same time! By doing them both at the same time, you’ll prevent the disappointment of one eyebrow being perfect and the other one not. Also, the chance that they’re similar is bigger.
Step 1
Let your eyebrows grow until they’re thick enough to work with. Make sure your face is clean. Did you know plucking eyebrows hurts less right after you showered? Find a place with good lightning, preferably daylight, and comb them before you start.
Step 2
It’s important to know where to start and end your eyebrows! A little guideline is easy to find. Put a brush or pencil against the beginning of your nostril and the inner corner of your eye. Make sure you make a straight line between them. There you go! You just found the beginning of your eyebrow. Mark this with a white eye pencil.
Step 3
To find the end of your eyebrow, get that same tool you use to find the beginning. Put it against the end of your nostril and the outer corner of your eye. Mark that with a white pencil too. It’s possible that your eyebrow may be a bit short. Then you can use this guideline to know up till where you have to draw your eyebrow.
Step 4
This step is one that gets forgotten very often! To know where your arch starts, you look at where your iris stops. That should be the highest point in your eyebrow. This too should be marked.
Step 5
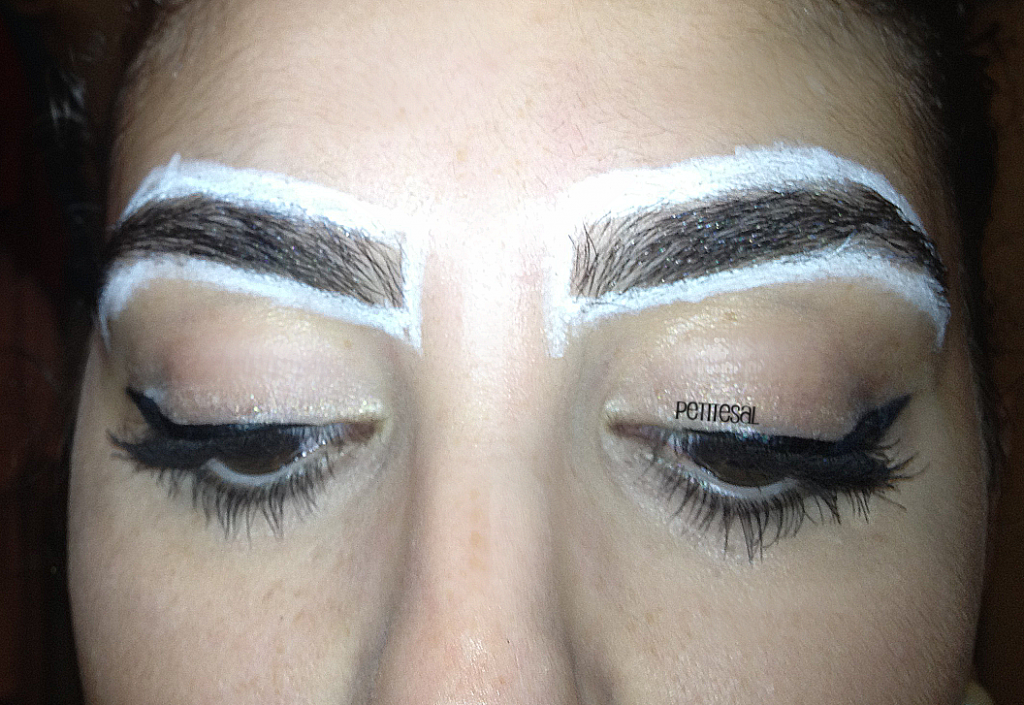
Now you have marked the three most important points of your eyebrow. Using a white eye pencil makes it really easy to do your brows! It’s noticeable on the skin and easy to remove when you don’t need the guidelines anymore.
Step 6
Connect the guidelines with the pass you have and draw a line with the white pencil. You’ll get two lines. This creates a new guideline. Everything that is marked white is going to be removed! Do the same thing with the bottom of the eyebrows. The lines you draw there have to be parallel to the lines you drew at the upper side of the eyebrows.
Step 7
It should look something like this! With the white pencil you can decide if you want to make your brows thinner. Tip: stay as close to your natural shape as possible! It will look more natural and it will suit your face more. The white lines will guide you while plucking. When you’re in doubt whether to remove a hair or not, don’t do it. It’s better to leave an extra hair than over pluck!
Well, what are you waiting for? Start plucking!
Step 8
Remove the white lines with a cleansing wipe. Hello, new eyebrow! After removing the white liner the shape of the brow is more visible. If you don’t like the result yet, you can pluck a little more. Go stand in front of a big mirror and look carefully. Are your eyebrows similar? They don’t have to be exactly the same. After all, eyebrows are like sisters. They’re not twins!
Step 9
If you’re happy with the result, comb the hairs up and trim them with little scissors. This will make your eyebrows a bit neater.
Step 10
Comb them back and smile, because you’ve successfully accomplished this eyebrow tutorial! See how neat it looks? Especially because you also plucked the upper side and because you trimmed your eyebrows a little.
-- Optional --
Step 11
To create that ultimate neat brow, you can fill them in a little with some powder or an eyebrow pencil.
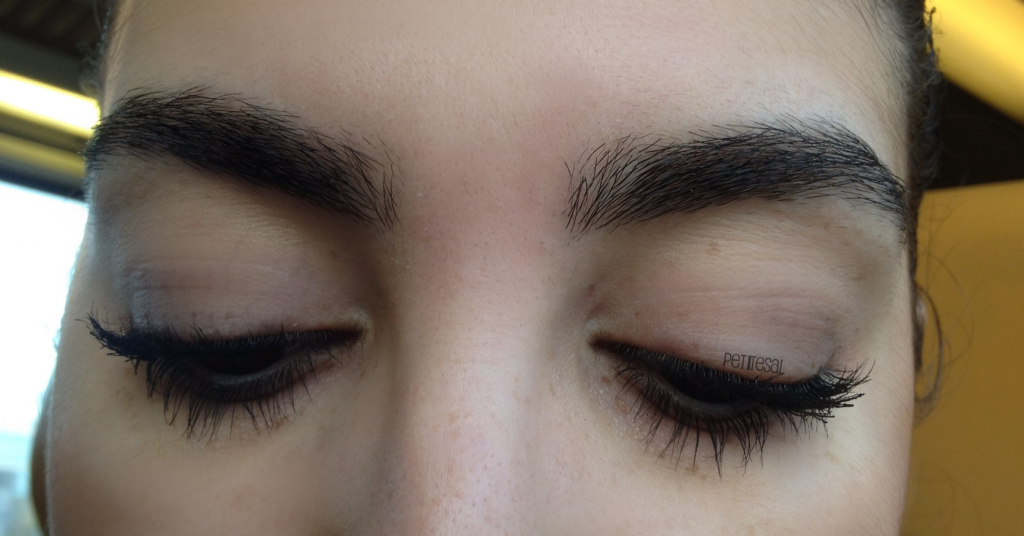
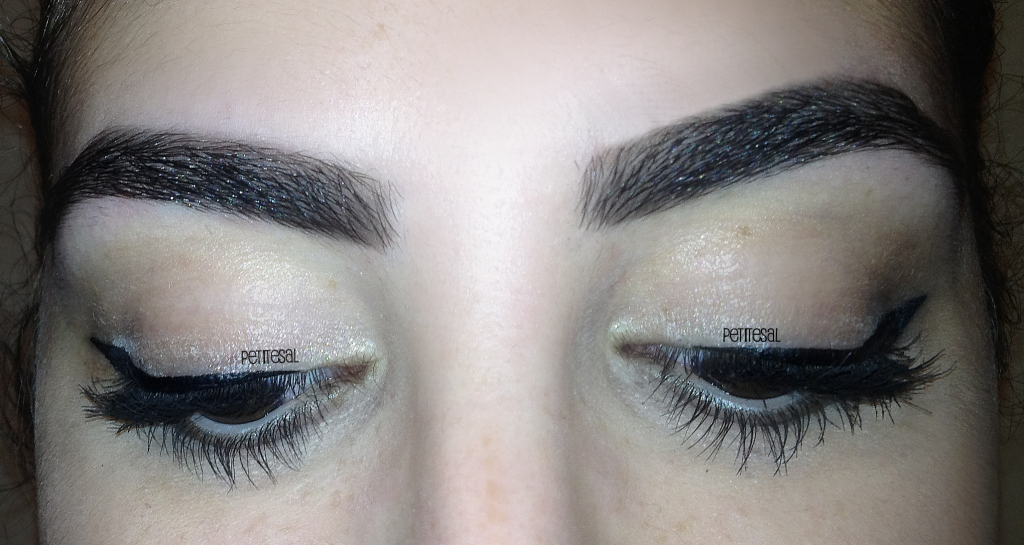
Let's have a look at the before and after!
Look how young I look with thick, messy brows. And also how messy my face looks.
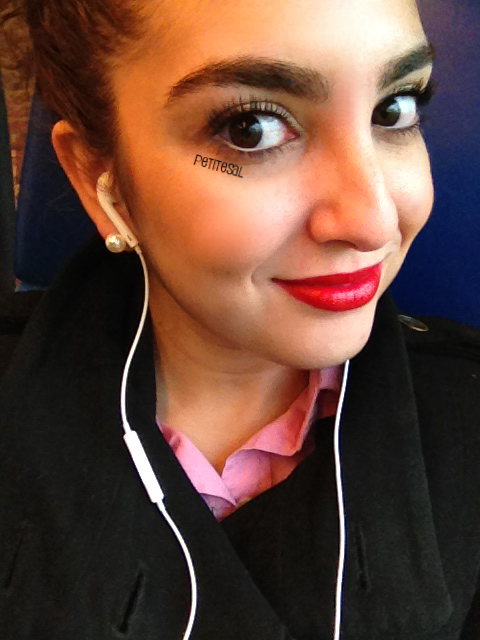
Let's have a look at the before and after!
Look how young I look with thick, messy brows. And also how messy my face looks.

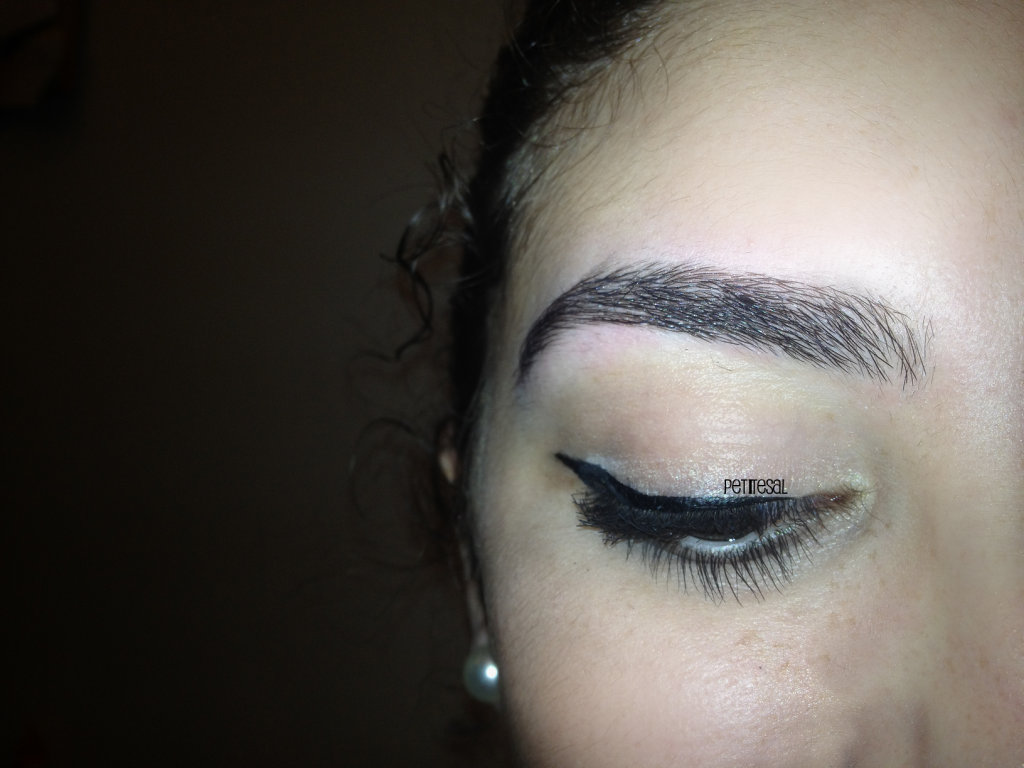
BEFORE
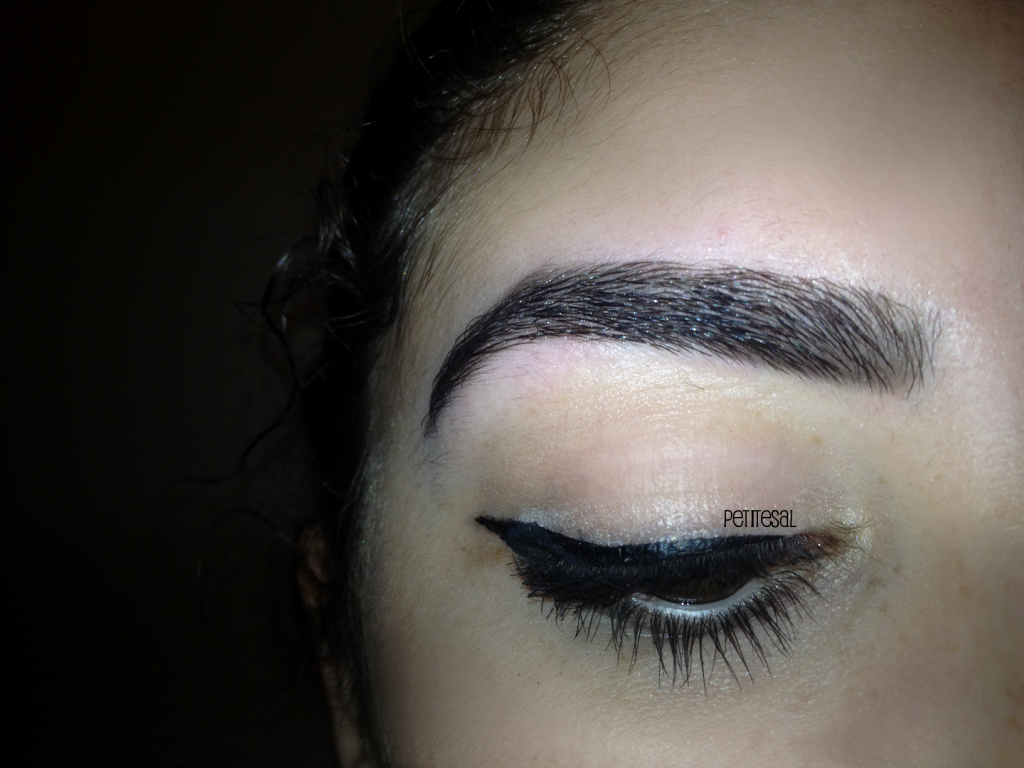
AFTER
That looks a lot better and a lot neater, doesn't it? They're not entirely similar, but that's okay. My brows are close sisters, not twins. Besides, the difference is not noticeable in real life. I'd rather have them unsimilar than over plucked!
Hope you find the tips helpful. If you use them, I'd love to see the results of your brows, so please share a link with the photo or Tweet/email me one!
What are your tricks to get that neat eyebrow?







such a great post! I am currently growing out my eyebrows at the moment (not a good look) so that I can shape them to something like yours actually! My shape is slightly similar to yours so I'll take this into consideration :D
ReplyDeleteHareem x
Thank you! The steps are easy to follow, so I hope that it works out for you! Growing your brows out is hell. But ruining them after growing them out all that time, is even worse!! Good luck! X
DeleteVery useful post, I have a problem with keeping mine neat, so I'm gonna use your advice and trim them with scissors, xoxo.
ReplyDeleteThank you! Trimming them has really helped me keeping them neat! I have very long hairs. You'll be amazed about the difference that it makes! X
DeleteThis was a great post, I never knew about any of these tricks! xo
ReplyDeleteThank you! Glad I could help! X
Deleteyou have perfect brows! I overplucked when I was in my teens and am regretting it now, they're not scarily thin but nowhere near as arched as I'd like. Hooray for eyebrow pencils lol. Such a great post x
ReplyDeleteThank you! Now you know my secret to perfect brows haha. Oh, I hear that a lot. I have the same problem. I have many gaps in my brows, expecially at the start of my brows. Hooray for makeup products indeed! Thank you! X
DeleteJust plucked mine :P I never use white eyeliner though. I've been plucking my brows for so long that I know how they should be shaped :)
ReplyDeleteBut thank you for a tutorial, i think it will be helpful to many ladies (and men..why not? :P)
Xxx <3
When I just pluck mine, I don't use it either. But I do when I want a new shape in my brows! Which is quite often haha yay for thick brows and the million options! You're welcome! Let me know if your sis has used it haha! :)
DeleteMen, women, whatever.. Everyone can use these guidelines! Xxxxx
Wat een prachtige wenkbrauwen heb je zeg ♥ ♥
ReplyDeleteZou willen dat ik zulke volle brows had =)
Liefs Denise
Dank je wel! Ik ben er ook erg trots op. Ze nemen wel ontzettend veel tijd in beslag, hoor! Dan zijn dunne wenkbrauwen al wat fijner :) X
DeleteLove this tutorial babe, great tips xx
ReplyDeleteThank you, honey! X
DeleteJij hebt wel echt de perfecte wenkbrauwen! haha.
ReplyDeleteMaar super handige post, wie weet kan ik het dan ook ooit zelf.
x
Chicks About Fashion
Ah dank je wel! De tips helpen daar bij, natuurlijk. Anders dan ben ik net een neanderthaler haha :)
DeleteHet is echt niet zo moeilijk als het lijkt! Probeer en je zult het vanzelf zien! X
loove this post, my eyebrows are the same best sisters but not a twin, got one round the other square :s
ReplyDeleteI love how easy u make it look heheh
thank u for sharing xx
Thank you! I have the same problem! One is square and the other one is round. But I like my brows more square, so I keep that in mind when I start plucking them. Thank you! It's really not that hard! X
DeleteGreat post! I wish I had the attention to detail (and steady hand!) to my do my own but unfortunately I'm just rubbish! Good job on yours though! :)
ReplyDeletehttp://www.youremyfavouriteflavour.blogspot.co.uk/
Thank you! Haha it is very important to have eye for detail and much patient when doing your brows. Or you'll risk ruining them!
DeleteThank you!! X
Great post! My eye brows are NOT the same i have to fill them in and add extra bits to areas to make them look acceptable lol . Your eyebrows are amazing! x
ReplyDeleteThank you so much! Brows are never the same!! Hooray for tweezers and makeup products to fix them! X
DeleteWhy am I unable to see the pictures? :( Owww I was the one that requested this post aswell! xx
ReplyDeleteLol after I posted that comment it let me see the pictures haha maybe it heard me! x
ReplyDeleteHaha! Glad you could see them, hon! After all, you were the one who requested the tutorial, like you said! Hope it was useful! X
DeleteI need to print this and give it to my wax girl, she never seems to understand what I mean!! Awesome post!!
ReplyDeleteFound you through the Beauty Obsessed bloghop!! Happilly following along!
I'm hosting a giveaway for the Barielle 5-Pack nail polish collection "Carnival Fiesta", I'd love if you would stop by my blog and say hi!
http://hairsprayandhighheels.blogspot.com/2012/12/giveawaybarielle-carnival-fiesta.html
xo,
Ange
Aw, that's a big compliment! Maybe you should skip the visit and do your brows yourself! Just let them grow a while so you have something to work with :) X
DeleteHey found you through BBloggers, great blog xo
ReplyDeletehttp://jadesecretcorner.blogspot.co.uk/
Thank you so much, Jde! I'll take a look at your blog immediately! X
DeleteI used to get my eyebrows threaded but I've been growing them out for the past year. I'll be using this tutorial from now on! I was thinking of getting my eyebrows tinted too because they're quite thin and when I fill them with pencil it looks like a 2 year old has coloured in my eyebrows. Do you think that's a good move? Also, I'm insanely jealous of your eyeliner line. I can never get mine as perfect as yours!
ReplyDeletean-accidental-discovery.blogspot.com
Glad I could help with this tutorial! It's really easy. You just need to keep your eyes open for details, but you'll learn if you do your eyebrows more often. Hahaha! In that case you should get your eyebrows tinted! I think you can get the supplies at the drugstore or you can let someone do it for you:) Ah thank you! I'll do a tutorial on it, since I get many comments on it! Happy holidays!
DeleteX
So helpful! Your eyebrows are gorgeous! x
ReplyDeletetheneondust.blogspot.com
woww what product/shade do you use to fill in your eyebrows? i have around the same colored eyebrows as you and whenever i try to fill them in they look weird. But yours look so neat and natural! :)
ReplyDelete